Sunday, 25 May 2014

Parmesan Cheese Crackers


Everyone loves cheese, right? These crackers are savory, a break from the usual sugary baked goods. My family absolutely adores these, so whenever i make them, they are gone within the day. 

Another great thing about this recipe is that it needs very minimal equipment (i.e. if you do not have an electric beater you can also mix by hand). You can also probably put the dough together in about 10 minutes, but note that you need to chill the dough for 30 minutes later.

Makes approximately 25 1.5 inch wide crackers.

Ingredients:
113 grams butter, at room temperature
85 grams grated Parmesan cheese
156 grams (1 1/4 cups) all purpose (plain) flour
1/4 teaspoon salt
1 teaspoon dried/fresh herbs (I used dried italian mixed herbs, you can use fresh or dried thyme, rosemary etc)
1/2 teaspoon freshly ground black pepper

Preparation:

Prepare the butter in one bowl. Measure out the parmesan cheese, all purpose flour, salt, herbs and black pepper in another bowl. 


1. Beat the butter on medium speed for about 2 - 3 minutes until creamy.


2. Whisk the dry ingredients together thoroughly. Use a bigger bowl if possible so that you have an easier time keeping your flour in the bowl.


3. Add in all the floury-cheese mixture into the creamed butter.


It will first look crumbly.


Then it will start to come together like this.


Use a spatula to form into a smooth dough.


4. Transfer the dough to a cling wrap.


5. Using your hands, make it into a log of about 13 inches, or to the diameter you like your cookies to be.

6. Cling wrap the dough, then put it into the freezer for 30 minutes to firm up. If you want your dough to remain a perfect round shape you can rotate the side your log rest on about every 10 minutes. About 10 minutes before you want to bake the dough, preheat your oven to 176 degree Celsius (350 degree Fahrenheit).


7. Take the dough out of the fridge, remove the cling wrap, then use a sharp knife and cut the log crosswise into 1/4 to 1/2 inches slices, depending on your preference. 

8. Place the crackers about 1.5 inches apart on a baking tray and bake for 22 minutes.


9. Either cool them on a wire rack or leave them to cool on the pan, both ways are fine.


Enjoy!


Thursday, 22 May 2014

Fruit Tart

Everyone complimented these fruit tarts! They are pleasant to look at, feels healthy (because of the fruits) and have packs a surprise (fruits are never predictable) You can customize your own fruit tart depending on what fruits you have on hand. 


Ingredients: 
Fruits for the topping

For Pastry Crust:
195 grams (1 1/2 cups) all purpose/plain flour
1/8 teaspoon salt
113 grams (1/2 cup) unsalted butter, at room temperature
50 grams (1/4 cups) granulated white sugar
1 egg, lightly beaten

See the full instructions on how to make sweet pastry crust here.

For Pastry Cream:
1 1/4 cups (300 ml) milk
1 teaspoon pure vanilla extract
3 egg yolks
50 grams (1/4 cup) granulated white sugar
20 grams (2 tablespoon) all-purpose flour
20 grams (2 tablespoon) cornstarch (corn flour)

See the full instructions on how to make pastry cream here.

For Apricot Glaze:
60 grams (1/4 cup) apricot jam or preserves
1 tablespoon water

To prepare apricot glaze: 

1. Measure out apricot jam and add water to it. Microwave to melt the mixture.


2. Strain the mixture through a strainer to remove chunks. If you find the glaze too thick, just add some hot water to thin it out.


 To assemble the fruit tart:

1. Prepare the sweet pastry crust and pastry cream and let both cool to room temperature before assembling the tart.

2. Using a pastry brush, cover the bottom and sides of the fruit tart with the apricot glaze. This prevents the tart base from becoming soggy when you add the fruits and pastry cream later. Let the apricot glaze dry for about 20 minutes.


3. Meanwhile, prepare the fruits that you will be using. I'm using kiwi here.


4. When the apricot glaze has dried, use an offset spatula to spread the pastry cream onto the tart shell. Be sure that you do this on a flat plate/surface so that you don't crack the tart shell.

5. Arrange the fruits as you like and then glaze the top of the fruits with a thin layer of apricot glaze. This helps seal in the moisture, especially for cut fruits. It also gives your tart a shiny coating.


If not eating instantly, you may refrigerate and bring to room temperature before serving. 
This recipe is taken from JoyofBaking.

Enjoy!

Pastry Cream


This pastry cream is rich, creamy and not too sweet. It is perfect to be used in fruit tarts, eclairs, puffs and other desserts.

Ingredients:
1 1/4 cups (300 ml) milk
1 teaspoon pure vanilla extract
3 egg yolks
50 grams (1/4 cup) granulated white sugar
20 grams (2 tablespoon) all-purpose flour
20 grams (2 tablespoon) cornstarch (corn flour)

You will also need:
A medium saucepan for heating milk/cooking pastry cream
A wet cloth

Makes about 240ml or 1 cup of pastry cream, enough for a 9 inch fruit tart.

Preparation:

Measure out the all purpose flour and corn starch and whisk together. 


Use the hand separation method to separate 3 yolks from the whites. Cling wrap the whites and keep in the fridge for other uses. You can use the whites to whip up some swiss meringue buttercream or macaroons.


Measure out sugar in a medium bowl and add the egg yolks to it.


1. Whisk the yolks and sugar till it's mixed.


 2. Add the flour mixture and whisk again, till you get a smooth paste.


3. Wet a clothe and place it at the table top, and put the medium bowl with your yolk mixture on it. This prevents the bowl from slipping when you do not have a free hand for holding down the bowl later on.


3. Measure out the milk into a saucepan and heat it on the stove, till it just comes to a boil (just starts to foam up). Remove from the heat and very SLOWLY add a little of the hot milk into the egg mixture, constantly whisking while you add. Make sure you keep whisking, and you add the milk slowly, this prevents the eggs from "cooking" and curdling up, which will destroy your pastry cream.


4. When you have combined all the hot milk into the egg mixture, pour the whole thing back into the saucepan, and keep whisking the mixture, till it comes to a boil. Monitor this carefully! For the next 30-60 seconds the mixture will thicken very very quickly. Keep whisking and when it becomes thick, remove from the heat. To play safe you can take off from the heat if you are unsure and if it is not thick enough place it back over the fire. You want to make sure you don't overcook this else it may curdle or become too hard to qualify as cream.


5. Now, stir in the vanilla essence.


6. Transfer into a clean bowl.

7. Immediately cling wrap the pastry cream, with the cling wrap touching the surface of the cream. This prevents a layer from forming on the surface of the pastry cream. Leave it in room temperature to cool. You may then either use it or refrigerate it up to 3 days.


The original recipe is taken from JoyofBaking. You can also use 1/2 vanilla bean in place of vanilla essence. But since i've ran out of it, i used this version.

Enjoy :)

Sweet Pastry Crust


This tastes like a cookie! Rich, sweet, and yummy. It can be refrigerated and stored for days, or even frozen and kept for rainy days when you need to prepare a quick dessert. The best part about this recipe is that it doesn't require rolling pins to roll out the dough (one less thing to wash!).

Note: 
  • It requires some time for chilling the dough during preparation so you need to set aside time for that. 
  • Be careful not to push up the movable base of the tart after you have pressed the dough into it (hold the sides).
Makes a 8-9 inch sweet pastry crust.

Ingredients:
195 grams (1 1/2 cups) all purpose/plain flour
1/8 teaspoon salt
113 grams (1/2 cup) unsalted butter, at room temperature
50 grams (1/4 cups) granulated white sugar
1 egg, lightly beaten

You will also need:
Tart pan(s)
Cling wrap


Preparation:
  • Whisk the flour and salt together.
  • Grease and flour a 8 - 9 inch tart pan with a removable bottom (I only greased and it worked too)
  • To bring the butter quickly to room temperature right after taking out of the fridge, i usually use the beaters to "cut" the butter into smaller pieces and leave it for about 5 to 10 minutes before beating.


1. Cream the butter on low speed for about 1 - 2 minutes to soften it.

2. Add the sugar and beat on high speed for about 3 - 5 minutes until light and fluffy.


2. Switch the beater to low speed and add the beaten egg to the mixture gradually, in 4 additions.


3. Once all the egg is incorporated, add in all the flour and mix until the mixture just comes together (the dough almost forms a ball, and all the flour is mixed in).


Use a spatula to scrap down the sides, and smooth out the dough into a ball.


4. Spread out a cling wrap on a clean tabletop, and press the dough into a disk about the size of your tart pan. I used a 6 inch and 4 inch pan instead so i separated the dough roughly into a big and small disc.


5. Cling wrap the discs, then place them on a plate and put it into the fridge for 15 - 30 minutes (or freezer for 10-15 minutes).


6. Take the dough out from the fridge and press the dough into your prepared tart pan using your fingers, spreading the dough out as evenly as possible. This dough do not need rolling out, as it tends to crack if you do that. Cling wrap the pans with dough then put it into the freezer for 15 minutes.


7. At this point, preheat your oven to 204 degree Celsius (400 degree Fahrenheit).

8. Take the pans(s) with dough out of the fridge. Use a fork and lightly prick the bottom of the pastry crust. This prevents the crust from puffing up and cracking when it bakes.


9. Place the tart pan(s) on a larger baking pan on a larger baking sheet and bake at 204 degree Celsius for 5 minutes. Then reduce the temperature to 176 degree Celsius (350 degree Fahrenheit) till the crust is dry and lightly browned (mine took about 6 minutes for the 4 inch one and 10 minutes for the 6 inch one).

10. Let the crust FULLY COOL before removing them from the pan! Otherwise it might crack.

This recipe is taken from Joyofbaking. There's a great video showing the preparation for this from the start to end. You may use the pastry crust for making fruit tarts.

Enjoy :)

Wednesday, 21 May 2014

How to separate egg yolks/whites

The most reliable way of separating egg yolks and egg whites is to use your fingers. 

Pros:
  • Better control over the egg yolk
  • Smaller chance of breaking the yolk (IMPORTANT!)

Cons:
  • Dirty your hands (with egg whites)
  • Maybe lose some of the weigh of the whites (about 1-2 grams)

I used to crack the eggs and pass it from one halved egg shell to another, but i realised that the sharp ends of the egg shell can "poke" my egg yolks, cause it to break and contaminate the egg whites. To have any trace of egg yolks in the egg whites can be a disastrous thing;  it can cause your egg whites to not whip up properly especially if you are preparing a meringue. 

A good practice is to have 3 bowls whenever you separate the eggs.
  • 1 for the separated yolks
  • 1 for the separated whites 
  • 1 for cracking the each egg over
Procedure: 

1. Crack the egg over one hand. Let the egg white run through your fingers into a bowl. Put the egg yolk into the yolk bowl. 

2. If the separation is clean (i..e. yolk did not break and contaminate the whites), pour the separated whites into the whites bowl. 

3. Repeat with each additional egg. 

The rationale behind this is to risk only one egg at one time. I have cracked 4 extra eggs due to carelessness once when i made macaroons. This is because certain recipes like macaroons cannot afford to have any trace of yolks in the whites that is used. If you separated 3 egg whites and then accidentally cracked a yolk into the mix, then the whole bowl of whites can't be used. 

Swiss Meringue Buttercream

This is a very stable swiss meringue buttercream. It is absolutely suitable for a hot country like Singapore (where i live in). It pipes up very well and uses only 3 ingredients. Simple to make and goes well with most cakes/cupcakes. It tastes buttery (It's buttercream!) and not too sweet ~ perfect for my taste. It's a keeper!

Ingredients:
105 grams egg white (3 regular 55 grams eggs)
135 grams white granulated sugar
227 grams unsalted butter, soft but still cold, cut into small equal size of cubes

You will also need:
A cold bath (big bowl with ice cubes and 2cm water)
A double broiler


Note: To separate egg whites cleanly, the best way i find is to use the hand separation method instead of passing the yolk from one half shell to another when cracking it. It will be best if you have a thermometer to make this, but it is not compulsory.

1. Boil some water to set up a double broiler. 

2. Remove the butter from the fridge and cut into small cubes (approximately 1 inch - don't have to precise, it is not important).

3. Prepare a big bowl with a few ice cubes with about 2cm of cold water and set aside. 

4. Transfer the egg whites and sugar into a metal bowl and set it over the double broiler (The original recipe called for adding the sugar in 3 batches but i forgot and added everything and it worked anyway). Keep whisking as soon as you set it over the broiler. 

If you have a thermometer, let the mixture come to 46 degree Celsius (115 degree Fahrenheit), then remove it from the heat. At this temperature the sugar would have dissolved. Otherwise, you can use your fingers to check that the sugar dissolved (when it is not gritty), then remove from the heat. It is not that hot that it would burn your fingers, so no worries. 


5. Remove from heat, then using a hand beater, beat at high speed till stiff peak forms (shown below). When you reached this stage, put the bowl into the ice bath that you prepared earlier. 


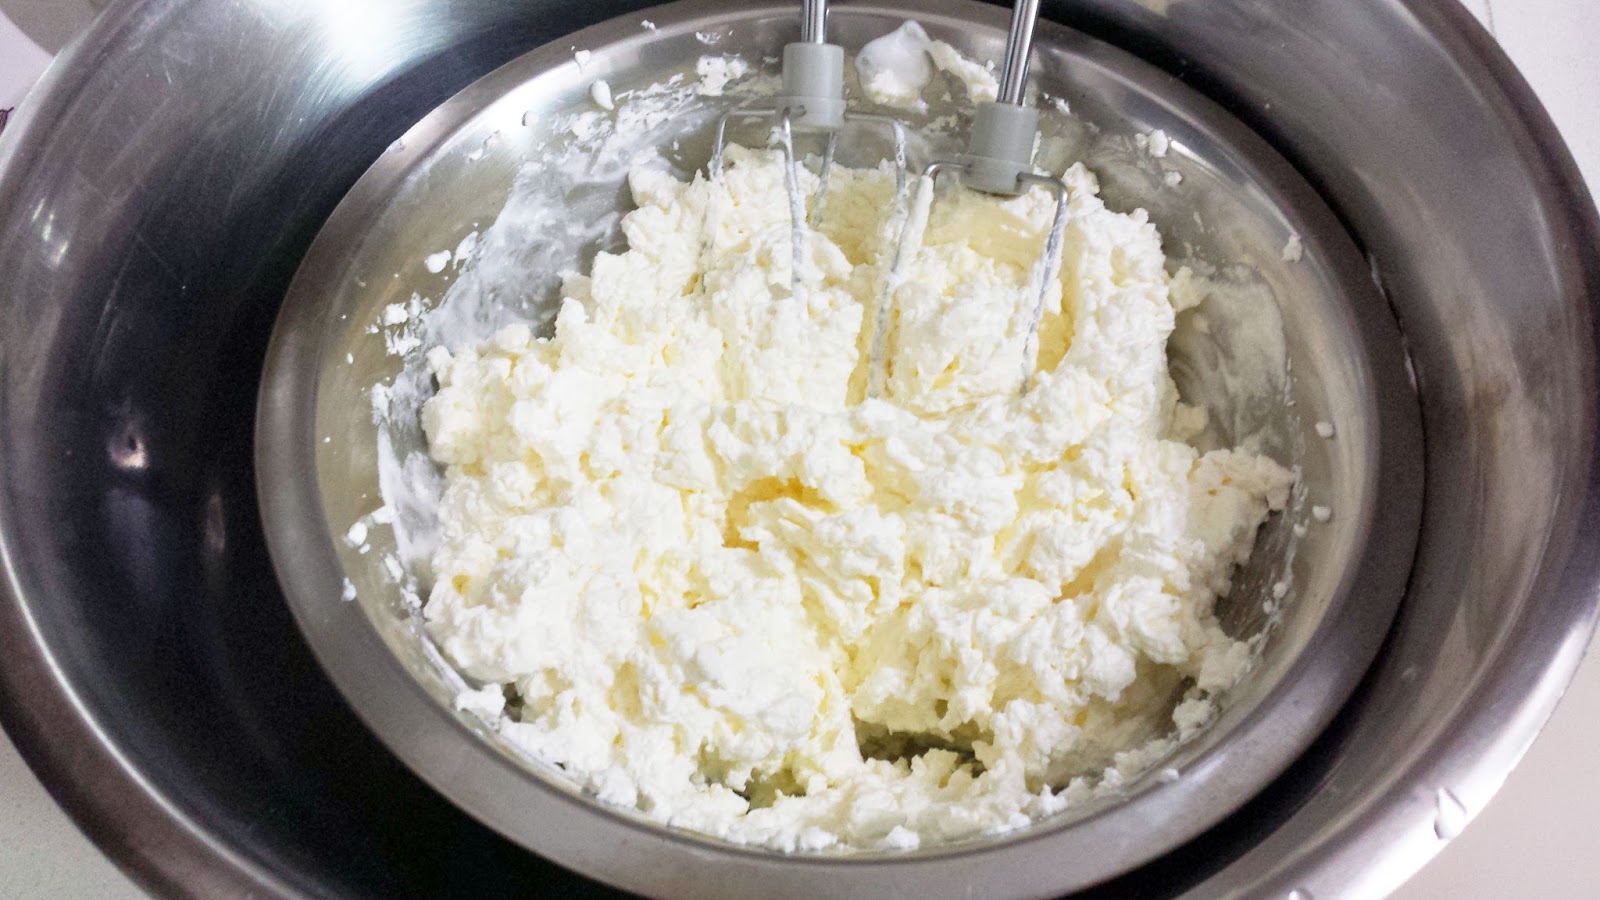
6. Then, with the mixer at low speed, mix in the butter piece by piece, adding the next one only after the previous one is completely incorporated.


7. When you have almost mixed in all the butter, the mixture will start to curdle. Just finish adding the butter (if you haven't) then switch to a spatula to continue to fold and stir the mixture till it is satiny and smooth. I folded it for about 8 to 10 minutes till i was satisfied with its "smoothness".


This recipe was taken from the Nasi Lemak Lover's Blog. It mentioned that if your buttercream curdles you are safe. i suppose that's something to take note of!

Frost it as you like on cupcakes. If you have 3 egg yolks left over from this, you can make a half portion of my cream brulee or pastry cream (that can be used in fruit tarts, eclairs etc).


Enjoy :)